Table Of Content
Print Then Cut allows you to print your designs using your home printer and then use your Cricut to cut around them, so you have the perfect shapes every time. Whether you want to make your own stickers, decals, or cutouts for scrapbooking, learning how to print and cut with Cricut is a complete game changer. Cricut Design Space is a software program that allows you to create and design your projects using various tools and templates.
Step 5: Choose Your Printer and Settings
Select the sticker group on the “Cut” layer, and delete the elements you don’t want to cut from the layers panel. In this project, you’ll find some hearts, stars, shapes, arrows, and a title. I plan to make a sticker sheet with all of them, but I don’t want to cut the arrows or the title. After printing, I set the material to “Copy Paper,” installed fine point blade, and loaded the mat to the machine. Don’t worry, though, there are a few things you can do to remedy that.
Print and cut with Cricut: send to printer
Free Printable PNG Tractor Alphabet and Numbers ⋆ Extraordinary Chaos - Extraordinary Chaos
Free Printable PNG Tractor Alphabet and Numbers ⋆ Extraordinary Chaos.
Posted: Thu, 21 Mar 2024 15:09:03 GMT [source]
So in this case, I selected around the roller skates. You can learn all about these types of images in my post How to Upload JPG and PNG Images to a Cricut. For this post, let’s say we uploaded this pair of roller skates. This is an image with fine details so select Complex Image.
Why Are the Cricut Print And Cut Size Changes Important?
Cricut Design Space is available for both Windows and Mac computers, so you’ll need to check that your printer is compatible with your OS. Second, consider the type of projects you’ll be working on. If you’re planning on doing a lot of printing, you’ll need a printer with high print quality. However, if you only need to print occasional projects, you can get away with a less expensive printer. Lastly, check the price of replacement ink or toner cartridges. Depending on how often you plan on using your printer, this can be a significant cost factor.
Project Preview Screen
EASYSUBLIFollow all the same main steps to prepare your frame and image in Cricut Design Space, including Flattening the result. I made two cute wreath frames that we can put a picture in and print directly from Cricut Design Space to a sublimation printer. Speaking of heat, sublimation requires high temperatures. You’ll need a heat source that can get up to about 400° Fahrenheit or 205° Celsius. I like to use an EasyPress with a mat, or an Autopress.
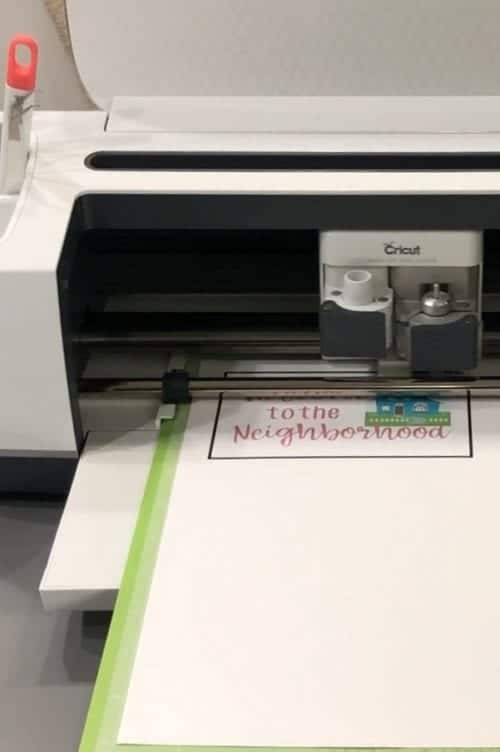
Then, load the mat with your printed sheet into the Cricut and press the flashing button to cut your design. Your window will look different depending on your computer and printer. Set the paper and print quality to the best matte options available.
But with the tips on the tutorial you can get rid of the box by doing an extra cut. In this case, we don’t need a “Print” or “Cut” layer; we need two separate layers. For instance, have you seen sticker sheets with a cool background, and the stickers are on top? I’ve wondered how to make cool stickers with some of Cricut’s patterns.
You’ll see that it’s now just a single flattened layer in the Layers Panel. One way to create a print image of this image is to use the Operation (Desktop) or Fill (Mobile) tool to convert an image from a cut image to a print image. Just select the image and in the Operation/Fill menu select Print then Cut. My favorite feature of the HP printer is the Instant Ink subscription. I love not running out of ink in the middle of a project! I pay $2.99 for up to 50 pages, and any unused pages roll over to the next month.
You will then be given the option to remove the background. This is up to you and depends on what your particular project is about. For my sticker, I’ve removed the background but if you want your image in a box or with a shape behind, then just leave it be. Next you need to decide if your image is Simple, Moderately Complex or Complex.
Learn how to search, filter, and use these projects that are pre-designed by professional artists. Familiarize yourself with options for working with your image layers, such as Group/Ungroup, Slice, Weld, Attach, and Contour. Access features such as Linetype, Color palette, Alignment, etc. for editing images and text. Learn about all of the icons and tools around the Canvas.
You can change these settings by opening your Design Studio and clicking the icon that looks like three bars on the top left-hand side of the screen. This takes you to a menu with all the main settings, including account details, firmware updates and how to manage custom materials. Print Then Cut enables you to print any graphic you like using your printer at home and then cut that shape out using your Cricut machine.
Make sure the correct machine is selected and click "Make It." Select the leftover layer, which will be the photo that was sliced. Press your sublimation print according to the instructions above. Select both sliced left layers and click "Flatten."
Free Printable Sweet Valentine's Stickers ⋆ Extraordinary Chaos - Extraordinary Chaos
Free Printable Sweet Valentine's Stickers ⋆ Extraordinary Chaos.
Posted: Wed, 10 Jan 2024 10:12:09 GMT [source]
Ensure you've selected your machine model to access only those options that are compatible with your machine. Keeping the selection, click “Attach” so everything is together on the mat. Duplicate the background and send it to the back, then click “Align” and select center. There’s always going to be a little marge or error. Select all the illustrations and the title and click “Group” on top of the layers panel.
Finally, select both the offset and the mix tapes and click Flatten once again, to make one single Print then Cut image. You can use the slider to create a border around the image. Generally I’ve found the rounded corner to be the most consistent and I almost always weld my offsets.
Between the two, however, I’d probably go with the HP Envy unless you are really set on that 12″ x 12″ printing. It’s less expensive to purchase and the overall quality of the print is higher. Jennifer Marx is a designer, an enthusiastic crafter, a lifelong teacher, and a proud overcomer of a variety of life's challenges. In her spare time she loves to play D&D and video games, garden, sew costumes, and go to Disney. And, remember, if you want to use my pretty watercolor egg picture, it’s free in my library (design #473). Once in the ‘Make Screen,’ Design Space will prompt you to print your image.


No comments:
Post a Comment